Saturday, July 28, 2012

Journaling 101- Being a Leo (cover) part #2

STAGE 6: Painting! 


Base Coat: Now that you have your cover and your centerpiece you need to find your white paint as a base coat. Then add your centerpiece where you want it. Like most of you, I chose the middle/Top, this way your center piece is the main part of your journal. WAIT!!!! If you are not painting your center piece the same color as your back round then wait till the end to glue it on!!!!!
Back Round:
I will now give you some examples of back rounds to chose from:


  • Fairy Garden- This design will require mostly pastels  This is an outdoor theme!
  1. White- to mix with other colors to make them lighter, clouds, & wind
  2. Light blue- Sky, pond, and any fairy outfits
  3. Yellow- Flowers & fairy outfits
  4. Green- grass & fairy outfits
  5. Pink- flowers & fairy outfits
  6. Gray- Stones
  • Space- depending on if you are making a planet or a space ship the standard colors are:
  1. Dark blue/green (Phthalocyanine Blue)- Main back round
  2. White- Stars 
  3. Yellow- Sun
  4. Orange- Sun
  5. Watered down Dark blue/green- Tinting stars
  • Under Water- This one of the easier themes because all it is is a gradient of blues
  1. White- Bubbles & mixing
  2. Teal/blue- Gradient
  3. Dark blue- Gradient
  4. Light Blue- Gradient
  5. Modge Podge- I think after you paint on all of the gradients and then add Modge Podge  to the bottom and pull up it helps mix the paint.

STAGE 7: Details!
This is the point in which you will add all of your details. For space you will need to add tiny stars, this will mean you will need a toothpick or any other tool that resembles a tooth pick. Also you need to mix a yellow/orange just a little bit "orangier" than this one. If you have any other details like flowers, fairies, bubbles, Etc. add those now!

There are layers of detail on mine, and the second layer consists of sun rays, depth for stars, and the Leo star symbol.
And this is my finished product!
Thank you for reading through! 
I hope you love your new journal!
Binding technique for your journals will be coming soon!

Journals 101- Being a Leo (Cover) Part #1

Over the past day or so I have been making a journal. This one is themed something completely different to it's purpose. The purpose is basically keeping track of all of the times I "like" a guy. Only for the purpose of learning from my mistakes. I wish I would have thought of this a lot earlier because this last year of junior high has been one of the highest mistake ratings of all my life. But back to my journal:

STAGE 1: Ideas
Ask yourself these simple questions:
1. What is the purpose of your journal?
For every journal there is a purpose. Depending on what that purpose is will generate Ideas.

2. Is the information secret?
If so, make you theme something that throws people off the scent

3. What kind of journal are you making?
This is where you will need your "purpose". Is this journal for? Diary or drawing? Water color or Acrylic? Pencil or Pen? Have you ever been to an art store and where looking for a good drawing pad with good paper? Well if you would ask the clerk "I want a notebook for some art I am doing" they would ask you what media you are using it for. Since mine is for journaling AND drawing I will pick a piece of paper that has a higher weight. This is because I want to stick a note card on both sides and still be able to flip it without it getting "Wabily". Now don't go jumping to conclusions and say....... "well if she said not "Wabily" then I better get water color paper..... NO!!!!!!!!!!!!!!!!!!!!! That stuff is expensive, and if you get a paper that is to thin, you can just reinforce it!


STAGE 2: The process of finding

Step 1: BOOK FINDER! If you don't want to sacrifice a couple bucks you could find some that you don't think you will read anymore or just get off of your Lazy butt, grab your wallet, and go to the dollar store to find some sacrificial books. ATTENTION~ your books will NOT be destroyed in the process!!!! They will just have no covers!!!!

Step 2:  CENTERPIECES? Yep! If you want you journal to come out smashing, you are going to need a centerpiece. Now if you cant make one like the one I did, you can find a button or something that draws attention, but just enough so that they recognize the other parts of the piece as well.

Step 3: COLORS~COLORS~COLORS! If you want your theme to be Ariel, then make your theme underwater like this one:
But seeing as I am keeping with the sun as the "planet of the Leos", mine will have a space  theme. This theme includes a dark blue back round, tiny clusters of stars, and of course, the sun.

Step 4: EXTRAS! If you knew me, you would know that I always go the Xtra mile. So to add some detail to my already extravagant piece I have added the Leo star symbol. You can also play around with the stars and their depth in the sky, tint a couple smaller ones with the color of the back round watered down to the extreme (don't want to black out any stars).


STAGE 3: Sculpting
This is probably where many of you will be like, hahahaha! Wait is she serious? Yup, I'm serious! No details, no tutorials, no nothing. If I where to just show you then my journal wouldn't be one of a kind, would it? I mean you could try to make the exact same thing, but my guess is that you don't have the 7 years of experience in the sculpting that I do. It all maters on what you theme is, that way you can find a centerpiece if you cant make one.

STAGE 5: Covers 
First step is to open to your front, inside cover and slice through the netting and paper. Be aware that there is glue connecting the book to the cover so if it falls back into its original place it will get stuck. Repeat cutting on back, inside cover.

Once you are done cutting the book itself will come apart from the cover. The book is still readable as I said before, but you will have to make an artificial cover.

Once again the book will come out of the cover and all will be well :)

Lectures

Life is but a silent whisper compared to our universe. This is what I took from one of my favorite teachers lectures about space. How it would take thousands of years traveling at light speed just to reach the edge of the milky way. It makes you wonder what is even possible. This brings me to think of all the wonderful things teachers do. All of the boring lectures that only one student remembers, to the the funny remarks like "No Shit Sherlock" or the one that my science teacher said when the boys where drawing penises on each others binders. All of the memories we have made in the junior high, good and bad, will help us learn that we are only a whisper compared to our universe

Saturday, July 21, 2012

Centaur Girl

This is just a random drawing I did last night. I guess I started drawing because of all the stress of my T.V. show lol. But I do have to say, it is one of my favorites.

Friday, July 6, 2012

Art Cartoons

We have been doing some cartoons in Art. It was our last project and these are my finished cartoons! Our teacher let us use our own style (thank god), I hate the "normal" kind of cartoons. The video we where watching about cartooning just drove me MAD!!! Of course only a limited amount of people in our school have a "style". So as everybody else was doing their little things and talking really loud, I was just sitting there  trying not to scream at them and focusing on my drawings. She said that we only had to turn in 1 cartoon, but I didn't hear her (oops!) so I ended up turning them all in. Of course they are all connected so why not? 

 The character above is based on LA INK'S Kat Von D. But that is based! SO don't get your underpants in a twist! I was just experimenting with the hair, I don't know why but I love doing that kind of hair!
This Ballerina has a rose band in her hair, of course my camera didn't pick up the color so it looks brown :/  O well!
I have no Idea what I was doing with this guy but I guess I was liking the style of the suit at the time.
The experiment with this one was the multi-colored dress. Her shoes where hard though, I had to experiment a lot!

Recycled Journal

I hate how in school they said to have 7 notebooks! I now have 4 or 5 unused notebooks that I really don't have the space for, including my art book which I only used 10 to 11 pages of. So I decided to make some use of it and tore out all of my old art pages like diagrams and stuff (which I will reuse at some point) and used the back piece of cardboard for the cover and replaced that with some paper fortified with duct tape. I have been watching jennibellie on youtube for quite some time now and I got some distress ink so I decided for my first project I would experiment with my new supplies. This notebook took less than 30min. to complete!
The supplies I used were quite limited, seeing as I only used about 5 different materials. 
These include:
  • Laser cut bird & cage 
  • Modge Podge
  • Texture glass
  • Gears 
  • Distress ink

The second page I did looked like this:It didn't quite turn out how I liked it because the Modge Podge didn't let the ink stick, thus making the face a weird shape. The eyes and mouth are recycled from a page in my journal that I ripped out. The words at the bottom are part of a small poem I wrote about secrets. 
A secret hid
A secret told 
We will bid 
On how your secret holders hold

It's basically trying to say that don't trust the people you tell your secrets to! I started to tell someone about a guy I used to like, and wham was I in trouble! And of course like most situations like that you can only think back to how stupid you where to like him in the first place! I mean he was just plain old........ lets just say I regret EVER liking him!!!!!!!

On that note I will  leave you. If you liked this post, more are on their way!

Thursday, July 5, 2012

Ariel Journal

I have been working on a couple art projects lately. This post will be about my journal I will be using to fill with a whole bunch of stuff. Here are some pictures and pages of in:

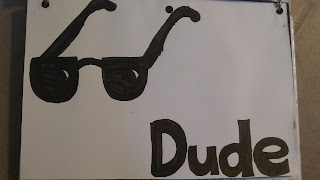
This is the cover of my journal. It has something to do with a little inside joke my friend and I have.
 This is a tag I have in a pocket page of my journal.
 The stamp above is the stamp I decided to use for the inside cover. Although it doesn't enclose my whole name, it serves a purpose.

The page to the right is the pocket page I had mentioned before and that is the tag I showed a couple of pictures ago.

The drawing above is one of, what is supposed to be, a version of me.

The one to the side is a drawing of a guy I have seen somewhere but I don't remember where. Kind of a mystery guy.

The pic above is one that I just had a weird feeling that I had to draw. Just a message to all of you lovesick teens out there, don't go for the things you know cannot be achieved............. never mind.

The one beside the text here is just a sketch I started to draw.

These are just some doodles I did that I felt I needed to chuck in there :)
 And this one is the inside, back cover. A little spot to put notes when I get totally lost in all of the hormones you get when it comes to being a teen.


I hope you have enjoyed this post, more are on their way!